home             about             house tour             studio             contact             advertise
Showing posts with label DIY. Show all posts

Saturday, April 6, 2013

Beeswax Candle making---


I have been wanting to make candles for quite some time now. I am really sensitive to a lot of aromas so I am really picky on the scents that we bring in the home. When I came across this Etsy shop selling beeswax, I was stoked. I can't believe how easy it is to make candles. You must try!


Materials needed:

beeswax. ( I used 5 pounds) It made 8 candles--ranging in sizes.
pot to boil in. ( I bought one at Goodwill for $3)
lighter
jars/candle containers ( I used canning jars and random cups) 
Candle wick ( I got mine at Michaels craft store for $9.99 with a 40% off coupon)
masking tape
scissors


 Step 1 //  Heat the wax. I put the heat on medium, uncovered for 10 + minutes. Do not bring to a boil. 


Step 2 // I took the jars and poured about a 1" off the melted wax into them. Once the wax was in the container, I put the cut wick in place (center) and held it there while it was there for good. 

Step 3 // I made an X with masking tape and cut a hole in the center for the wick. 

Step 4 // Pour the remaining wax in the jar. I filled the jars up to the top, leaving 1/2-1" left.

Step 5 // Allow to cool and harden. I then cut the wicks for the length was about 1/2". 


I love them! I gave the cute little tea cup and saucer to a friend. I got it for 50 cents at Goodwill. PRESH! 


I took some fabric from Jody's shoppe and wrapped it around my jars and used embroidery floss to hold it in place. I thought it was festive for spring and happy for my kitchen table! LOVE!

Have you ever made candles? Do you have any tips for me? I really want to try making beeswax tapers with the honeycomb.......

Enjoy your weekend! 


Tuesday, April 2, 2013

How to hang a mounted picture TUTORIAL!

I have been staring at this gorgeous picture from our wedding (2005) for far too long. It was mounted on backing when printed from Fagan Studios. I love this picture. It was taken right before our ceremony when we were gathered with our wedding party and family. We did a quick prayer before the festivities started. I have been meaning to get it professionally framed for almost 8 years. Opps. So, I opted for this fun/casual/cheap solution instead! 


Materials needed:

scissors
ribbon
mod podge 
construction paper/card stock
super glue
ruler


You want to figure out the measurements for your ribbon to be glued. Mark it with a pencil.


Cut the ribbon to desired length and super glue it to the back.


Mod podge the paper on the back. I used the MP on both the paper and back of the picture. Let dry. and repeat with another layer of MP.


I let it dry for a couple of hours for good measure. I chose to hang it in my bedroom! I love it! The contrast of the yellow ribbon with the black/white photo is perfect-o! 


If you have pictures that you want to mount....check out Pinterest for ideas. You can decoupage them onto insulation board or a canvas. Super easy. 


Tuesday, March 26, 2013

instagram art + cass house = everywhere

I am so happy that I finally decided to use my instagram pix! They have been just waiting to be played with and displayed in our home! I have been using instagram for over 2 years now on my iPhone. It started out with me using it to tone/filter my pictures and upload on Facebook, but has revolutionized into an explosion! I love it! I prefer IG more than FB. I like the simplicity of it. I have been looking into different websites/apps on my phone for ordering pix. I ended up going with Kanvess. I dump my pictures off my phone frequently, so a photo app was out of the question. I am very pleased with Kanvess. I ordered 100 prints, all 3"x 3". The quality is great. The paper is sturdy and not grainy. I love it. I have thoroughly enjoyed looking through my pictures the old school way, in my hands! Here are some ways I have started using them! 


I started out with an old barn window that I got from my friends, Eric and Danielle! It is from an abandoned barn here in Rochester! My hus screwed it into the wall on the top and bottom. 


I have been wanting to hang this window for a year and a half now. I just didn't know what I wanted to do with it after that. I love how the IG prints look on there. The contrast of the pictures with the paint. So much history.....window + pictures. Memories. Love. Of course, I used washi tape! Oh my word, I am really obsessed with washi tape too. I got the tape from my BFF, Jody for my birthday. She got it on Etsy. They now sell this stuff at Target, Michaels, Hobby Lobby etc. I use it on everything:  gifts, cards, walls etc. It is just decorative tape. I love how mine looks vintage! 


Here is a area shot of the living room! Everytime, I walk by this I smile!


That is what is all about with decorating....making us smile. our hearts overflow. I want my home to be a reflection of our priorities, personalities, style and needs! I love this. It is so fun how watching our home come along........as the days go.....creating a space that reflects my family!

In our main floor bathroom, I used some washi tape and made a mini collage. I am not sold on this space yet...but I am brainstorming of what to do with it. Here is it now.


When I ordered the pictures, I made sure to order ones for the girls bedrooms! I love the fact that Zion can look at her pictures and see people that she loves....her little friends. I used washi tape and added them next to her gallery wall! She loves it! She helped me hang them up!


In Kiyah's room, I put a picture in a 4x4 frame that I had. I just used double sided tape and put it on white paper. I used washi tape on the others and went around her shadow box! 


 Seriously, I have a problem....... I just love IG prints! Do you have a favorite website or phone app that you have had good luck with? Do you have a favorite place that you have found washi tape? Have you done any crafts with IG prints? I love ideas! Please share! 

Don't forget to follow me on Instagram, Facebook and Pinterest! You can click on the icons on the top right of my blog too! 


Monday, March 25, 2013

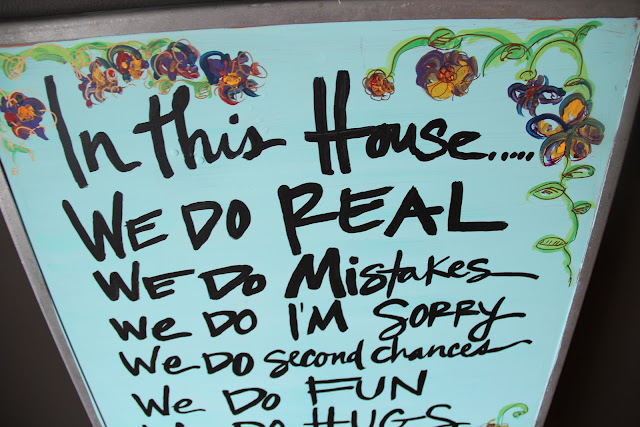
Family Rules Art

I have been wanting to make a family rules sign for a couple of years now! They are all over Pinterest. I have pinned some favorites over time for inspiration. My favorite one was this one:


I loved the text. the words. the simplicity. so i went with it. inspired.....GO!

Back in the summer, when we were building my studio, my husband and i were hooked up with Old Navy shelving units here in Rochester! Our store was moving locations and started fresh with everything new. So we have used the shelves for the general purpose, but also ART! as you can see here...


They started out like this. So I taped them off and painted them with paint as a base/foundation/back drop. I had extras laying around so I thought It would be perfect. So I started this project over a year ago.....whoops. It has been on the "list" to finish for months! So below, is what I did a year ago. 


I wanted to add more text and make the letters more bold. I also wanted to add some floral to it and some gold! Like everyone else, I am obsessed with gold/glitter right now! Here is the finished product!


I love it! We are going to hang it up in our dining room! So fun. Does your family have House Rules? or a motto? I love having the uplifting words as a reminder to our fam. Happy Monday! If you would like me to make you some House Rules, Contact me anytime! I love making custom art! xoxoxo


Tuesday, March 12, 2013

Art Gallery Wall

Today I thought it would be fun to show the details on my newly updated wall in my living room! It has been a working progress. Ever since I put our computer in our living room, I have been wanting to personalize this space. With it being our "office area", I wanted it to be fun, inspiring, creative without being too busy or distracting. I love color and fun punches of personal favs. So here is our new gallery wall! 


The top left oval painting is Zakiyah. My friend, Kelly made it for her! I love it! I am so happy with how this space turned out. 


 Here is a good picture of the wall! As I mentioned here, my clock is from Target!


My desk is from IKEA. I would like a bigger one someday. It is not urgent, just a little small for our stuff. The amazing blue chair is TJ MAXX!


I got these Umbra polaroid pictures from my friend Shel a few years back. I love how you can just slip in pixs in the frames. They measure 3.5" by 3.5". The top two are me when I was little. The middle left is Andy and I when we started dating. It was taken at the north shore (MN) in 2002! The middle right is Andy as a little boy.....hilarious. The bottom is Andy snakeboarding back in his glory days. ;)


 This is sketch I did on a plane ride 5+ years ago, when we were coming home from Mexico. We had taken the youth to a orphanage to work for a week or so. I love it. It is my life now! I am so blessed. I love how it says, "dancing in the kitchen with my Nova". Which is Andy's nickname, and now our daughter, Zakiyah's middle name. 

I also love using clip boards to hang art. Easy to change up. Fun and casual. 


This is Andy with his dad and bro. Love. I think our girls look a lot like him!


Here is Zakiyah at one week old. So precious. Photo taken by Michelle Fagan


My sister, Chelsea just gave this picture to Zakiyah for her baby dedication! I love how the commandments are perfect for little ones. The colors and background are so happy too! 


I got this sketch on Etsy a couple of years ago for Andy' birthday. I thought it would be fun to give him random art over the years. We don't own a mini van, however, we have discussed how we approve of the Volkswagen Van. It definitely tops the Coolness factor for car-life. So, I gave this to Andy, stating this is the only van we will ever own. 


I just finished this hoop art this past weekend. I found the quote on Pinterest! It says, "Everything you say to your child is absorbed, catalogued and remembered." Amen. Good reminder for me to keep it together! I used embroidery floss, fabric, and felt. I stretched duct cloth on the hoop.  It was super easy, cheap, and inspirational for me as a mother! 


I gave this art to Andy this past Valentines day/birthday. I got the PDF of the "I love everything about you" on here. I water colored it then mod podged it on some duct cloth. I painted the duct cloth first then mod podged on the paper. I painted on the flowers/ arrows/ hearts after the mod podge dried. I used some sharpie marker to define the flowers and arrows. I used this walnut circle frame from my Grandma Cherie. I think it turned out great. 


My cousin, Brit sent us this fabulous Cass Street picture. She goes to college at University of Wisconsin-Lacrosse and stumbled upon this sign in her town! She surprised me with real mail and printed this for me! I love it and I love her! She rocks!


This is a pix of my girls! Kiyah was a couple weeks old here and Zi was 2.5 yo. Precious ladies.


Our friends gave us this "love will save the day" sign for a gift when they got married. It is perfect! 


Zion Leilani at 1 yo. Photo taken by Fagan's. Her eyes sparkle in this picture. Stunning.


My BIL and SIL took this picture at a local apple orchard. I love how happy Z is here. She was 1.5 yo. 


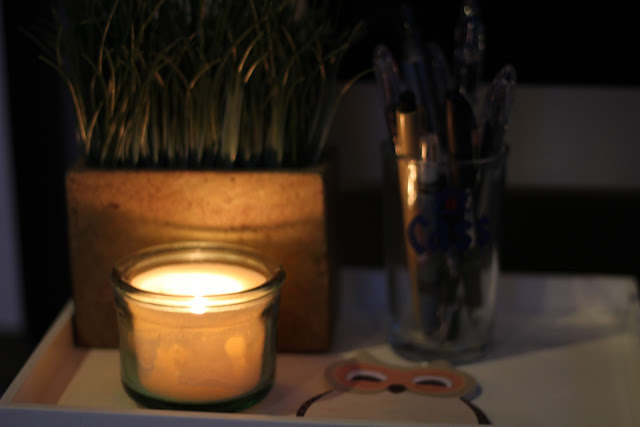
I am working on making my desk more happy. I brought down this tray from our bathroom. It is West Elm, candle is Aveda, faux greens are Pier One, and Cass Fresh glass is a beer in Korea. We have some glasses from our friends. The owl paper is Target. 


Do you have any gallery walls you are working on? I seriously have 8 in our house! Never too many! Have a great day!